How to Replace IR Remote Toggle Codes in a BroadLink RM Mini 3 with Discrete/Separate Codes

Many product manufacturers provide remote controls with their devices that have toggle buttons on them, e.g. many TV remotes have a single power button, and that same button turns the TV off if on or on if off. This makes it difficult to create automations using the RM Mini 3 that only turn a device (for example) off (and not on).

When my dad got a new TV, he gave me his old (dumb) LG TV. It did not have a working CEC interface so that I could control the power and inputs via HDMI from my Raspberry Pi 3B+, so I set about controlling it from my BroadLink RM Mini 3. The only problem was the toggles. I learned via searching that not only did discrete, single function IR codes exist, but that the information for obtaining and converting those codes in a fashion that was compatible with my RM Mini 3 was mixed and dubious. Most of what was out there related to HomeAssistant, and doesn’t work for Homebridge’s homebridge-broadlink-rm plugin. After days of trial and error, I eventually worked out how to retrieve and convert the codes…

Continue reading

How to Extract All Your Custom IR Hex Codes from a Broadlink RM Mini 3 for Homebridge, Version 2

Back in 2020, I posted a procedure I had worked out to extract ALL of the hex codes that had been recorded in a BroadLink RM Mini 3 en masse in order to eliminate the need to re-record every button individually (which could be impossible if the physical remote is either broken or missing).

Well, BroadLink changed the game. They replaced their e-Control app with a new BroadLink app, and the trick I originally used to obtain all of the codes no longer works. I’d received a new red RM Mini 3 for christmas, was unable to set it up using e-Control, installed the new app, and being blissfully unaware of the new limitations, I lazily added codes over some time, thinking I could extract them later when I wanted to create new automations.

Once I learned that I couldn’t use the old trick, I set about figuring out a workaround, and I succeeded. I took notes and commented on the old post that I’d send the raw version of the notes to anyone who requested them, and I have received numerous such requests, so I figured it was time to share them in a new post…

  1. Broadlink RM Mini3 (red)
  2. Mac with Monterey 12.6.7 with:
  3. iPhone running iOS 16.2 with:
  4. Raspberry Pi B3 running:

While I will not be reviewing how to get homebridge or the plugin up and running and configured, I will provide a few tips that may save you some aggravation:

  • If you have multiple RM Mini 3’s, you will need a hosts section at the top level of the plugin’s config and each accessory will need a “host” item with the static DHCP address of the device
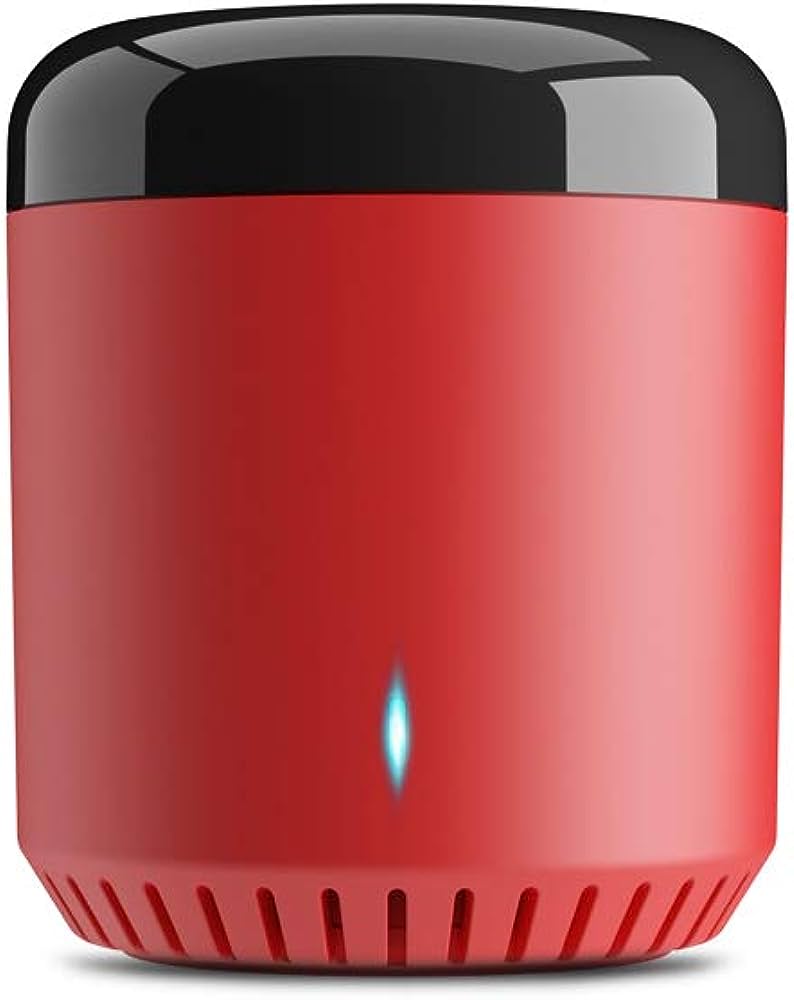
  • Note that even though the packaging of the red BroadLink RM Mini says it is a “3”, it has the same or similar firmware as the RM 4, so you need to add the isRM4 item and set it to true.
  • You need to “unlock” the mini in the BroadLink app under Home -> <Your Mini> -> ... -> Property -> Lock device

Now, to extract the codes, here is what you need to do…

  1. On your iPhone…
    1. Install the Intelligent Home Center (IHC) app. In that app…
    2. Login using the same BroadLink account you used with the BroadLink app. (Note, you will see it populate with your devices & codes, but they will not work – that’s OK. All we need is the unencrypted device data.)
  2. On your Mac…
    1. Connect your iPhone to your Mac using a USB/Lightning cable
    2. Click the iPhone in a Finder window’s left pane (Note: iPhone Synching has moved from the old iTunes app to the Finder)
    3. Click “Trust” on the Finder window to trust your iPhone (if prompted)
    4. Unlock your iPhone and tap “Trust” when the dialog appears prompting you to trust your computer
    5. In the Finder window with your phone selected…
      1. Select the General tab in the finder window
      2. Select Backup all of the data on your iPhone to this Mac
      3. Click Back Up Now. (This may take awhile.)
    6. Launch the DB Browser for SQLite app (We will come back to this.)
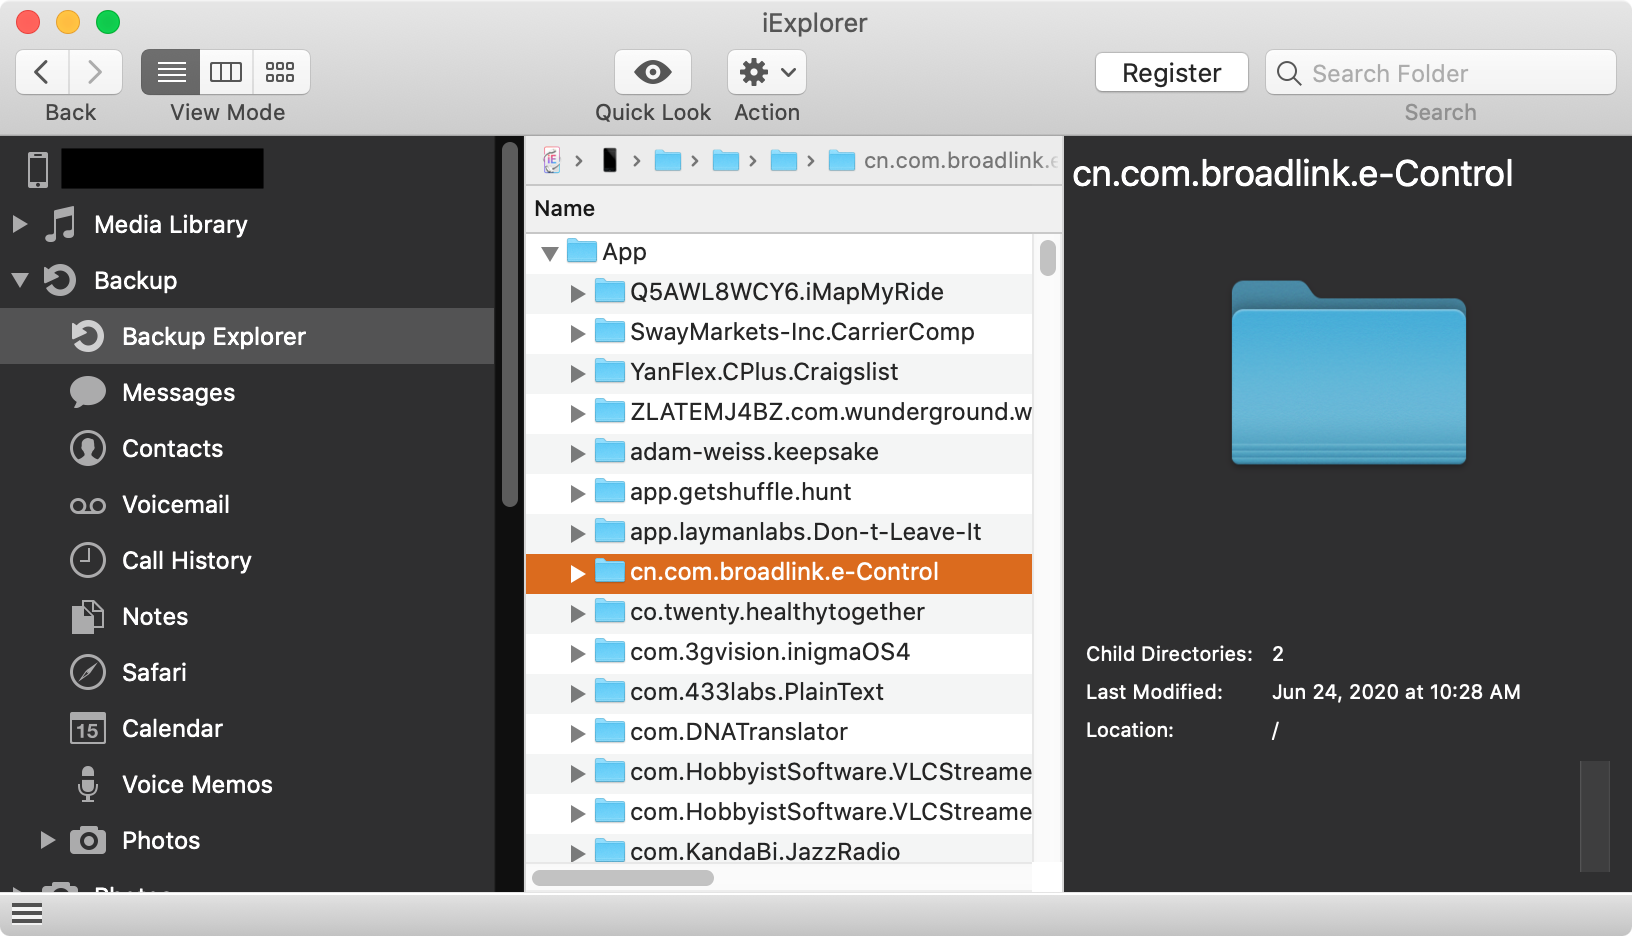
    7. Launch iExplorer (Click the “Demo” mode button). It may take some time for the app to process the data on your phone. In this app…
      1. Under Browse iTunes Backups in the left pane, expand your phone’s name and select Backup Explorer
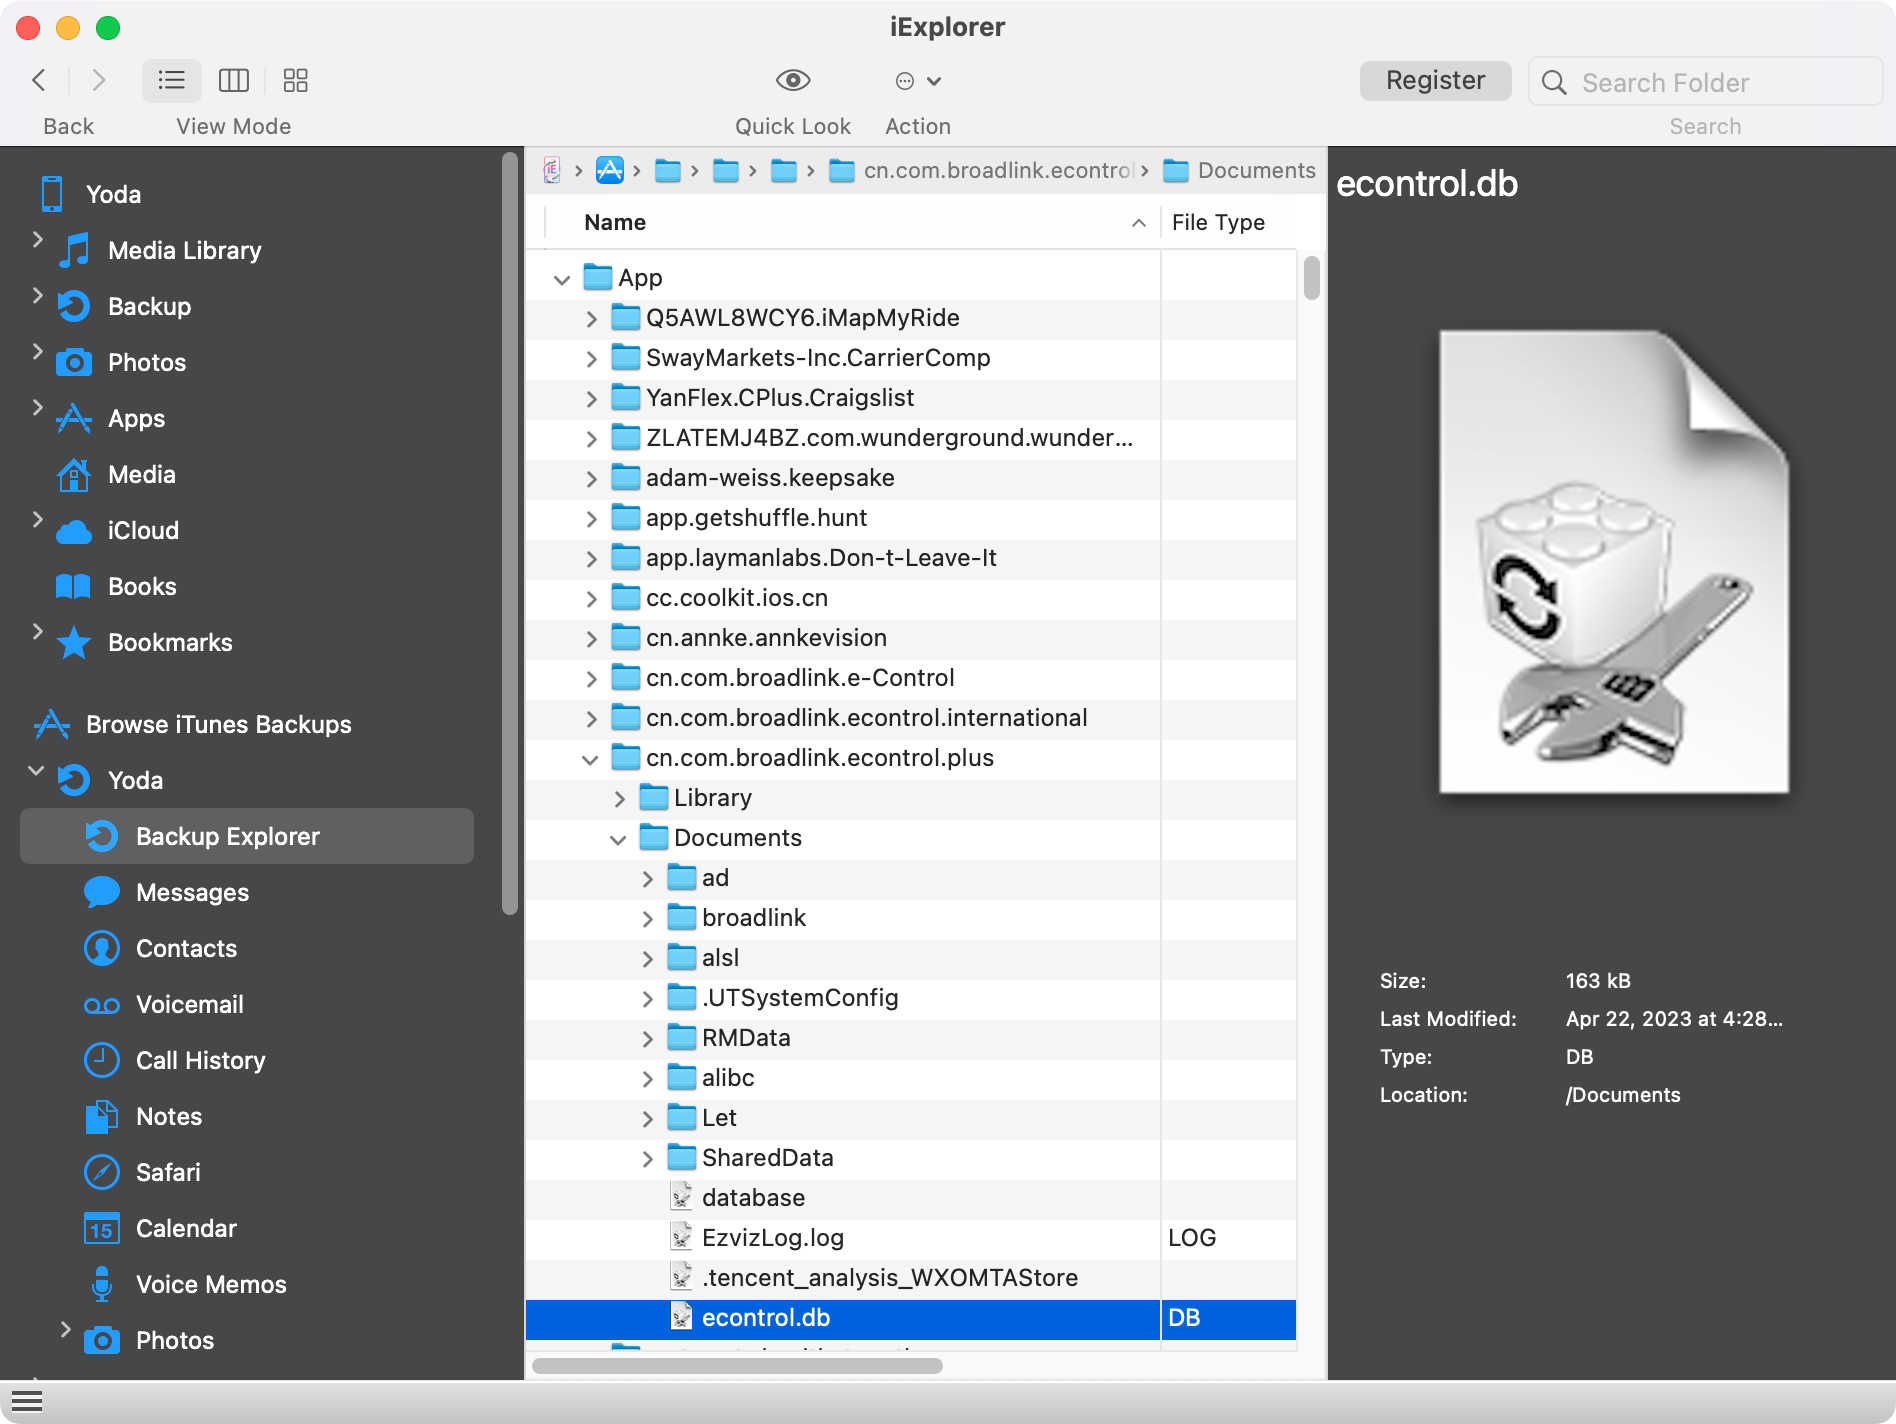
      2. In the center pane, expand the folder path: App/cn.com.broadlink.econtrol.plus/Documents
      3. Drag the file econtrol.db onto the DB Browser for SQLite app in the dock (note, this is coming from the Intelligent Home Center (IHC) app, so if it is not there, go back to step 1.1. On your iPhone)
    8. In the DB Browser for SQLite app…
      1. Click the Browse Data tab
      2. In the Table menu, select the buttonCodeTable
      3. Make sure that the code column is populated. These are your button codes that you are looking for, but they don’t come with the button names. To get every code labeled, we are going to execute an SQL command…
      4. Click the Execute SQL tab
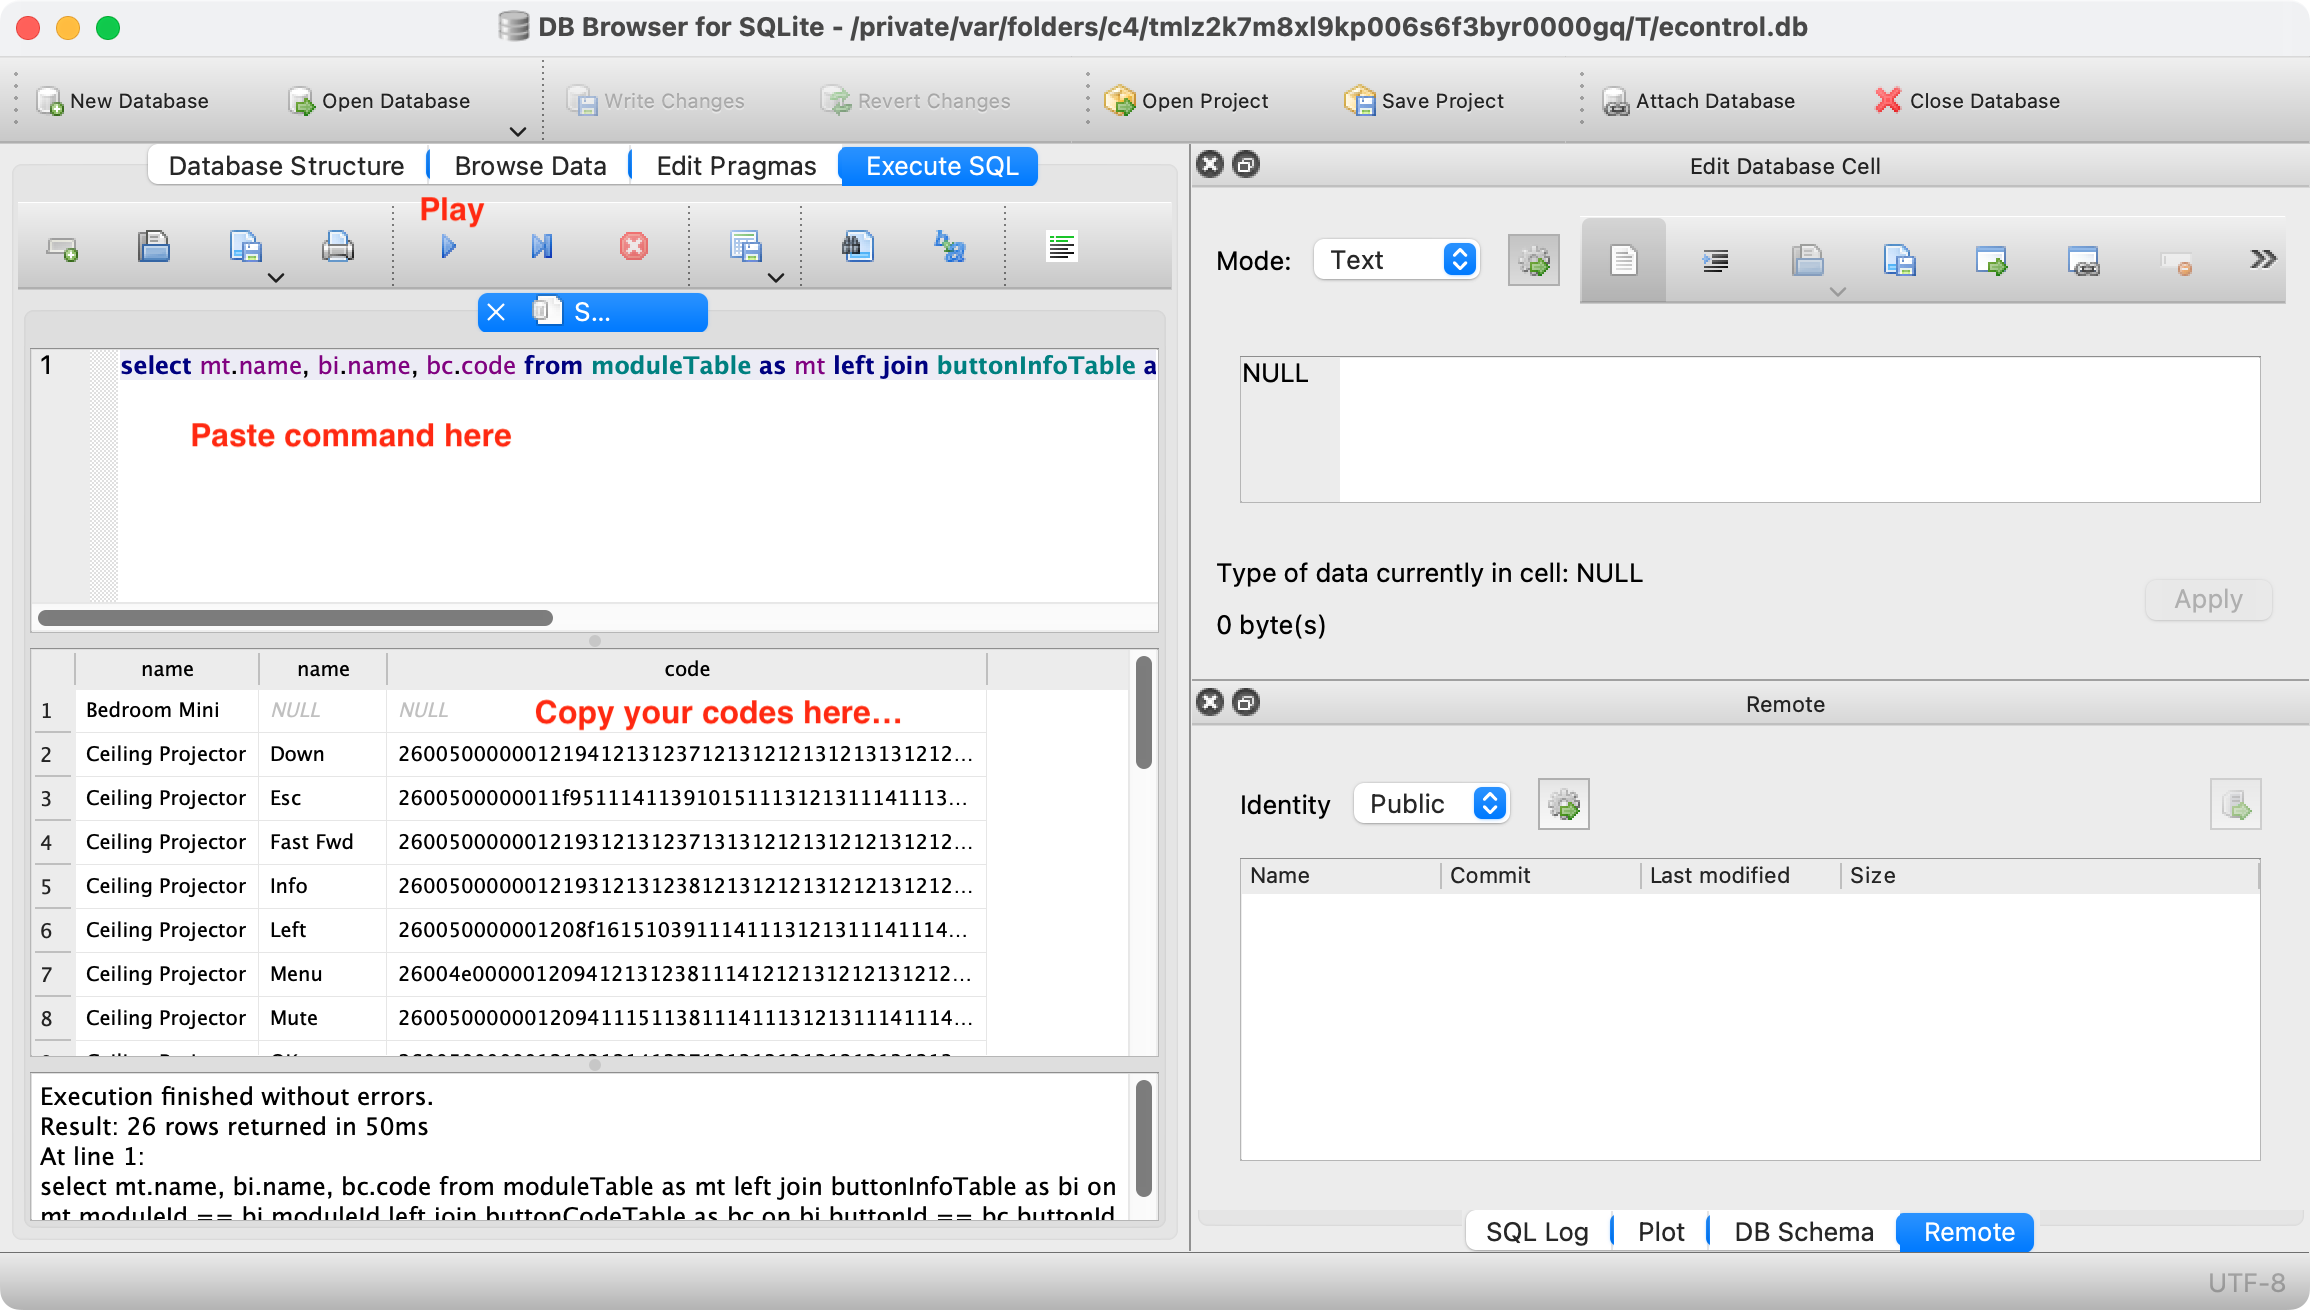
      5. In the top pane, paste this command: select mt.name, bi.name, bc.code from moduleTable as mt left join buttonInfoTable as bi on mt.moduleId == bi.moduleId left join buttonCodeTable as bc on bi.buttonId == bc.buttonId
      6. Click the blue play button
      7. Click in the resulting table in the pane below and copy its contents (e.g. command-a to select all and command-c to copy)
      8. Paste the results into a text file (e.g. using Text Edit.app) or excel document
    9. Use the hex codes in the last column to add accessories to your homebridge config file. (The columns are Remote name, Button Name, Button ID, Code ID, and Hex Code. Note, if you created any combo buttons that send a series of codes, there will be repeated hex codes and Button IDs.)
  3. In your homebridge-broadlink-rm config settings, paste your codes.

Here’s an example of an accessory entry in the homebridge config.json file:

        {
            "platform": "BroadlinkRM",
            "name": "Broadlink RM",
            "hideScanFrequencyButton": false,
            "hideLearnButton": false,
            "hideWelcomeMessage": true,
            "hosts": [
                {
                    "address": "192.168.1.61",
                    "mac": "c8:f7:42:16:f7:7f",
                    "isRFSupported": false,
                    "isRM4": false
                },
                {
                    "address": "192.168.1.168",
                    "mac": "24:df:a7:36:54:9a",
                    "isRFSupported": false,
                    "isRM4": true
                }
            ],
            "accessories": [
                {
                    "name": "TV",
                    "host": "192.168.1.168",
                    "type": "outlet",
                    "allowResend": true,
                    "data": {
                        "on": "2600500000011f94111411391114111312131114111312141039121311381238113911381238113911381213113812391039111411131213111411391114111312131139113911381100051c0001254b11000d05",
                        "off": "2600500000011f94111411391114111312131114111312141039121311381238113911381238113911381213113812391039111411131213111411391114111312131139113911381100051c0001254b11000d05"
                    }
                }
]

}

You will have to restart homebridge after adding accessories so that the new controls show up in your Home app on your iPhone.

Want to keep elderly parents company virtually during the pandemic? – How to create a FaceTime Portal between iPads

When the Coronavirus Pandemic hit and I started working from home, I started worrying about my elderly parents who could no longer babysit my niece and nephew on a regular basis, go to church, go to restaurants, meet with friends, etc..  They were getting lonely and were starting to feel the strain of their new-found isolation.  Since I had recently bought them a Wyze cam for Christmas and had one of my own, and had previously shared those feeds to help me monitor their security feed, I hacked together a sub-standard and annoying “portal” using the cameras and our respective iPads.  Theirs was in their family room and I set mine up in my office. For most of the year, I kept them company during the work day and it did wonders for their ability to cope with this new world.

The solution had all sorts of problems though. There was a significant audio delay, the connection would go down from time to time, the Wyze interface was difficult for my parents to use, I had to wear headphones to prevent echo feedback (since Wyze has no echo cancellation), and it seemed that the connection would get choppy whenever they pulled out their phones (seemed like an interference issue).  I’d bought them a WiFi Extender , but it didn’t seem to help.  During a particularly choppy conversation recently, I started googling for alternate solutions and I happened upon a github project called teleportme by PaperCutSoftware, which was a simple scheduled shell script on a pair of Mac Minis running FaceTime to establish a portal between 2 coastal offices above each office’s water coolers.  They were scheduled to establish a FaceTime call every morning and hang up after work.  I wouldn’t have thought of using FaceTime running for hours a day, but apparently it was possible and reliable – and you don’t need a cell provider account to use it, so I set out to see if I could do this using a pair of iPads.  Using tips from their setup, this is how I figured out how to do it. Continue reading

How to Extract All Your Custom IR Hex Codes from a Broadlink RM Mini 3 for Homebridge

UPDATE: A new version of this article was just published, as the procedure in this article no longer works using BroadLink’s new app…

The homebridge-broadlink-rm plugin for homebridge allows you to automate your devices which have an IR (infrared) remote by emitting those button codes from a Broadlink RM Mini3. You can add individual “buttons” that exist in the RM Mini’s iPhone app (e-Control), by adding the button’s hex code to homebridge’s configuration file (~/.homebridge/config.json).

The homebridge plugin provides a way to obtain these codes, one-at-a-time, by using the “Learn” button it adds to your Home app. You tap the Learn button, then point your remote at the RM Mini3 and hit the button you want to be able to control. The hex code can then be retrieved from the homebridge log file.

However, if you have numerous remotes with numerous buttons already programmed into the RM Mini3, and some remotes in a drawer, some without batteries, this can be a quite long and tedious process. I personally had 238 individual codes programmed into my RM Mini3 and some of my remotes took coin batteries that were dead and I had no replacements on hand. So I wanted a way to grab all of the codes at once without having to manually re-record all of the button presses. I worked out the process to do this last night, and googling this stuff was rather laborious, so I am posting what I learned here.

Here is my setup:

  1. Broadlink RM Mini3
  2. MacBook running:
    1. Catalina 10.15.6
    2. iExplorer
  3. iPhone running iOS 13.6 with:
    1. e-Control app
  4. Raspberry Pi B3 running:
    1. Homebridge

I will not be reviewing how to get homebridge or the Broadlink plugin working.

  1. Connect your iPhone to your Mac using a USB/Lightning cable
  2. Click the iPhone in a Finder window’s left pane (Note: iPhone Synching has moved from the old iTunes app to the Finder)
  3. Click “Trust” on the Finder window to trust your iPhone
  4. Unlock your iPhone and tap “Trust” when the dialog appears prompting you to trust your computer
  5. Launch iExplorer (Click the “Demo” mode button). It may take some time for the app to process the data on your phone.
  6. Click “Backup” and then “Backup Explorer” in the left pane
  7. Expand the “Apps” selection
  8. Drag the folder named “cn.com.broadlink.e-Control” to a location in the Finder (e.g. your desktop)
  9. Download, install, and launch an app called DB Browser for SQLite
  10. In the “cn.com.broadlink.e-Control” folder you saved on your computer, locate and drag the e-Control database file “cn.com.broadlink.e-Control/Documents/BroadLinkDeviceList.sqlite” onto the DB Browser for SQLite app
  11. Click the “Execute SQL” tab
  12. In the top left text area, paste the following SQL query (without the quotes): “select s.name, b.name, c.buttonID, c.codeID, hex(c.code) from broadlink_subir as s left join broadlink_button as b using(subirID) left join broadlink_code as c using(buttonID)
  13. Click in the resulting table in the pane below and copy its contents (e.g. command-a to select all and command-c to copy)
  14. Paste the results into a text file (e.g. using Text Edit.app) or excel document
  15. Use the hex codes in the last column to add accessories to your homebridge config file. (The columns are Remote name, Button Name, Button ID, Code ID, and Hex Code. Note, if you created any combo buttons that send a series of codes, there will be repeated hex codes and Button IDs.)

Here’s an example of what you will get:

TV Power 171 177 26003C00211A3E1A20000B97201A211A3E1A201A211A201A211A201A2037201A3F1A20000B962119211A3E1A211A201A201A211A201A2136211A3E1A20000D05000000000000000000000000
TV Source 172 178 26004E00211A3E1A211A201A211A201A2037201A211A3E1A211A20000B96211A3E1A201A211A201A211A2036211A201A3F1A201A20000B97201A3F19211A201A211A201A2037201A211A3E1A211A20000D0500000000000000000000

And here’s an example of an accessory entry in the config.json file:

            {
                "name":"TV",
                "type":"outlet",
                "data":{
                    "on":"26004e002119211a3e1a211a201a2119211a201a2136211a3e1a21000b96201a211a3e1a201a211a201a211a201a213621193f1a20000b96201a211a3e1a201a211a201a211a201a2136201a3f1a20000d0500000000000000000000",
                    "off":"26004e002119211a3e1a211a201a2119211a201a2136211a3e1a21000b96201a211a3e1a201a211a201a211a201a213621193f1a20000b96201a211a3e1a201a211a201a211a201a2136201a3f1a20000d0500000000000000000000"
                }
            },

You will have to restart homebridge after adding accessories so that the new controls show up in your Home app on your iPhone.

How to get an iPhone 11 or SE (2nd gen) to connect calls through an Airave 2.5 – and why you shouldn’t bother

My wife and I each got new iPhones recently (exactly a month ago today). We had some difficulty getting our phones to make calls initially, but that’s another story, as is the story of the erroneous double charge for the Sprint upgrade/activation (both Apple and Sprint charged for the same activation and I’d been signed up without consent for the Sprint Complete protection plan!). I think in the past month, we’ve spent nearly 10 hours combined speaking to Sprint reps for all the issues, possibly more (and there’s probably a call yet to be had to address an incomplete refund for those erroneous charges).

But I digress, so let me jump straight into the how-to to reconnect your iPhone to the Airave 2.5… Continue reading

How to Create Real Recurring Location-based iOS Reminders (after iOS 13)

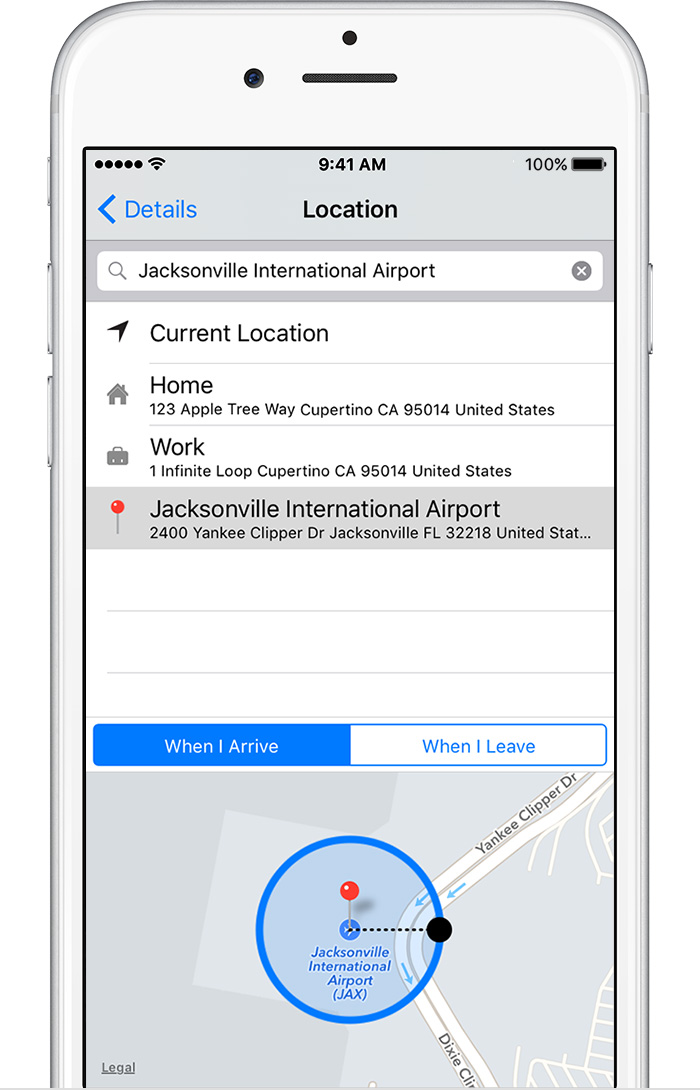
In How to Create Real Recurring Location-based iOS Reminders, I described a method using IFTTT to mark location-based reminders as incomplete.  Shortly after that post, I upgraded my iPhone to iOS 13 and quickly discovered that the update broke then IFTTT iOS Reminders service.  All triggers and actions in the service no longer worked as expected (or at all), including IFTTT’s Reminder Completed in List trigger.  So I was back to dismissing my recurring location-based reminders without marking them as complete.  And on top of that, despite the additional functionality of the new Reminders app, I started encountering all sorts of issues, including the fact that Reminders in Notification Center started randomly turning itself off.  While I haven’t found a solution to that and other new Reminders issues, I did come up with a solution to replace IFTTT’s broken Reminder Completed in List trigger.  Read on to discover how… Continue reading

Free land line white-list & call-screening without porting your number to google voice

My parents are getting up there in age and awhile back, I was dismayed when my dad asked me if a message from “Apple” on his answering machine about his iCloud account being hacked was real (he thought it was!).

I’d been suggesting for awhile that he port his number to google voice so he could stop paying for land line service.  I’d looked up how to go about doing it.  But I’d been second guessing that option after reading some horror stories about people losing their life-long phone numbers.  Plus, I wasn’t too thrilled about google listening in on all their calls.

I had set up Nomorobo for them some time ago, and it was effective for awhile, but the telemarketing industry and scammers started spoofing random local numbers.  So they were getting multiple scam calls a day and I worried about them falling for a phishing scam, or worse.  Their neighbor had fallen victim to a scam where a caller pretended to be their grandson and needed bail money asap.  She ended up being scammed out of $10k.

I had looked through all the services from my parents’ landline provider for blocking callers, etc, but the options were very limited, even though they had a VOIP service through their cable company.  There was no way to implement a white list (a list of known callers that are allowed to call you), nor was there a way to implement call screening other than caller ID.

But I recently had an inspiration based on the way nomorobo is set up.  I could do both – whitelist all my parents known callers and send the rest through call screening using google voice, without porting their number and without (the majority of) their calls being listened in on by google!  Read on to find out how… Continue reading

How to Create Real Recurring Location-based iOS Reminders

Inexplicably, iOS Reminders do not have a repeat option underneath their “Remind me at a location” setting when creating a reminder, or a “Remind me next time” (…I arrive here) selection when you hard-press a reminder notification.  The only way to hackily get repeated location-based reminders is to never mark them as completed.  The problem with that way of dealing with location-based reminders is that 1. they eventually disappear from your notifications and 2. you cannot tell whether you’ve actually completed the reminded task or it is still yet to be done.

I have figured out a way to create recurring location-based reminders using:

  1. iCloud synchronized Reminders
  2. IFTTT
  3. Dropbox
  4. Folder action on an always-on computer

Read on to learn how… Continue reading

Hey Siri, when is the next bus home?

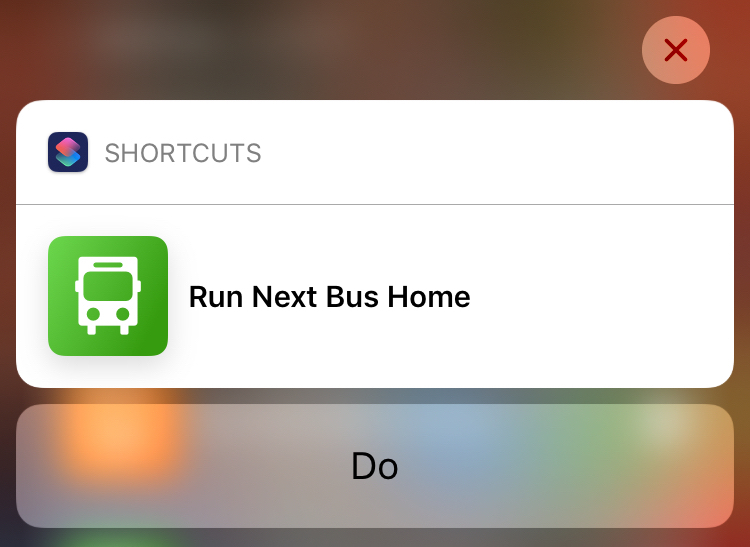
I just put the finishing touches on my bus shortcuts on my iPhone.  It always bugged me that I couldn’t ask Siri “When’s the next bus to work?” or “When’s the next bus home?”.  NJ Transit has a web interface called My Bus Now and I always have it up on a first gen iPad in the bathroom in the morning, but frequently, as I’m rushing around to make it to the bus, I want to do a quick time check to see how far away the bus is.  My hands aren’t always free or I don’t want to stop running around, unlock the phone, navigate my home screen, tap my homescreen shortcut, put my glasses on, wait for the page to load, and look at the screen to make sure it’s the right bus route (which I frequently miss and sit there at the stop kicking myself for not noticing the next bus was for a different route number).  It’s much faster, accurate, and more efficient to just say “He Siri, when’s the next bus to work?”, with all those details taken care of for me.  With Siri Shortcuts in iOS 12, this is now possible.

Continue reading

Temporary fix for an iPhone that cannot access .local addresses

And here’s the answer:

  • Turn airplane mode on, then off

The fastest way to do this is to swipe up from the bottom of the screen to access the control center, then tap the airplane icon:
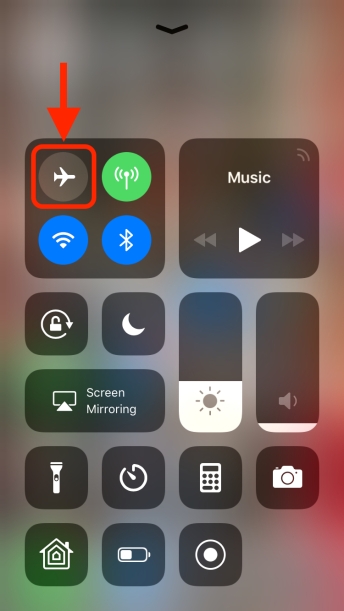
IMG_2344EC134209-1.jpeg

Wait for the other icons to darken, as the phone turns off wifi, bluetooth, and cellular signals, then tap the airplane to turn those back on again.  After doing this, you should be able to load anything on your local network using its .local address (as long as it’s configured correctly on the remote device).

This is a temporary solution.  Access to .local addresses will stop again at some point and you will have to repeat this work-around to regain access.

Here’s the cause and why this solution works:

At some point, an iOS update seems to have caused this issue.  The problem is Apple’s usage of .local addresses for its bonjour services (which allows devices to advertise their services, such as printing an airplay).  Bonjour does not play nicely with other services which use .local.  Bonjour is somehow interrupting the DNS resolution of these addresses.  It intercepts the communication of for example, your browser and the device providing the service and the presenting symptom (at least in my case) is a browser timeout.  The browser claims that the website simply stopped responding.  Each device has its own strategy to try and resolve domain names.  On a mac, that can be configured using the /etc/hosts file, but on an iPhone, the user doesn’t have a way of editing that equivalent setting.  What’s more is, the iPhone caches these shortcuts, and it’s that cache that is the problem.  Turning on airplane mode flushes that cache and allows your services you’ve manually set up on your network’s devices to get through.  However at some point, bonjour is going to come along and cause that cache to be reinitialized and cause the issue to recur.  This is why this is not a permanent solution.

What is a .local address?

Dot local addresses are memorable shortcuts to access other devices on your local network. It’s like your own personal dot com. All major OS’s support them: macOS, Windows, Linux, even RaspberryPi. You can use it for screen sharing, file access, web pages, ssh, etc..  If you’re running a web server on a computer in your home, you can access it from a web browser on another device by going to it’s .local address in a web browser, e.g. mymac.local.

I use my .local domains from my iPhone to do a number of things when I’m at home on my local network: screen sharing via the VNC app, ssh via the Terminus app, watching live TV via the iPhone’s Safari browser that accesses my EyeTV media server, and some websites I created for fun.  I usually add bookmarks to local web URLs to my home screen for easy access.

How do I find/edit my computer’s .local domain name?

Each mac on your network has a .local address based on your computer’s name. You can find it in the Sharing pane of the System Preferences app. At the top of the pane, there’s a entry field for your computer’s name and underneath that is some descriptive text. You can enter any name you want, but not all characters on your keyboard are allowed to be used in a domain name. macOS thus removes some characters, such as apostrophes, and replaces other characters (such as spaces) with dashes.

I tried using the .local address after this fix, but it doesn’t work.

macOS doesn’t activate a .local address by default. You must share the service you want to use in the Sharing pane of the System Preferences app. The section under the computer name has a panel with checkboxes where you can turn on or off certain services.  As long as one is turned on, the .local address is active.  However, the only devices that can access it are ones that are on the same network.  If you’re trying to access it from an iPhone, for example, make sure that you are connected to the same WiFi network as the computer you’re trying to reach.  If all else fails, you can use the computer’s local IP address (assigned by DHCP).  You can find that address in the Network pane of the System Preferences app.  If that works, and you’ve tried turning airplane mode on & off on your iPhone, then the .local should work. If that doesn’t work, let me know in the comments.

Other things I tried.

I first encountered this issue when I was trying to access my EyeTV media server.  I have used this server for over a decade, but about 4 or 5 years ago, I moved and no longer was receiving a good broadcast TV signal.  I recently bought a new outdoor directional antenna however, and now had stuff to watch.  So I opened up the old bookmark I used to reliably use on my iPhone for years that used the .local address of the computer with the EyeTV media server.  It wouldn’t work!  I discovered that if I went to the computer’s DHCP address, it did work.  I could have just changed the bookmark, but it irks me when stuff that should work, doesn’t, so I called Apple.

Apple Support had me “Reset All Settings” because they could not explain why it didn’t work.  (I’ll be submitting a bug report after this post.)  It worked!  It was a heavy-handed solution and I spent a week returning my phone to its normal behavior.  Then the next day I tried to access the server, the problem was back!

Googling this was not much help.  There are many solutions out there that suggest things like turning your phone off/on, clearing your browser cache, turning sharing preferences off and back on, etc..  None of them worked.  Every once in awhile, I randomly noticed that the .local addresses started working, but shortly there-after would stop working again.  And I didn’t want to have to reset all settings every time this happened.  Finally, after reading about the /etc/hosts file and mDNSresponder, I started googling things like “reset iphone dns”, which lead me to a solution for another problem that involved cycling the airplane mode setting and to my delight, it worked.

I’ll probably use the DHCP-assigned IP address for bookmarks in the future, but I finally know enough about what’s going on to be satisfied.  I hate it when things don’t work.